
Loading...
Yoga asanas are a very ancient, tried-and-tested set of poses that help improve overall well-being, reduce stress, lower blood pressure, and enhance mobility.
In managing diabetes, yoga can help cultivate balance and poise. Balance is essential in controlling blood sugar levels, which otherwise would go up and down with every stress or excitation of your nervous system.
Adding some simple yogic postures to your daily exercise regime can aid the diabetes treatment that your doctor prescribes. But, as with any exercise, start only after consulting your doctor and an experienced yoga practitioner.
Of all the benefits of yoga for people with diabetes, 4 key areas are of greater importance …
Stress is one of the most debilitating factors affecting the mind and body. It can cause an imbalance in blood sugar levels. Stress also produces other related issues such as hypertension, insulin resistance, and increased risk of cardiovascular diseases. People with diabetes further worry about their state of health constantly, which only adds to the condition.
Practicing yoga creates a very soothing, therapeutic effect on the mind and body, says Diabetes UK. The stillness and peaceful breathing attained in many postures effectively decrease stress levels. By reducing stress, your body gets a better chance to respond to medications faster and aid in its own healing.
Diabetes is one of those conditions, for example, that can affect the heart if seriously neglected. Similarly, other ailments like hypertension, obesity, or cholesterol – or if you have a family history of heart disease – can all have adverse and multiplicative effects on your heart.
With yoga, this spiral of negativity that affects your heart is reversed. Yoga is both an exercise as well as a mind-care system. It works on the body and its organs at the same time that it also works on the state of mind. Since most diseases like stress, hypertension, obesity, or cholesterol – and even diabetes – involve a mutually-enabling vicious spiral of downward health, yoga arrests this cycle.
One of the main complications of diabetes is neuropathy. It starts with a tingling of nerves under the foot or in the palms of the hands, but if neglected, it can turn into nerve damage. Unknown to people living with diabetes, these symptoms may not be restricted to the outer limbs of the body but also affect the internal systems due to nerve impairment.
A medically reviewed article in EverydayHealth.com mentions that practicing yoga for about 30 minutes every day has been seen to help patients with neuropathy symptoms. Yoga helps the nervous system by helping improve nerve conduction. It also helps boost the body’s metabolism, regulates hormonal levels, and balances glucose levels. All this, in turn, also helps reduce further damage to nerve health.
Tara Stiles, the yoga expert, and teacher (who features in Dr. Deepak Chopra’s works), shows us in a YouTube video how yoga can give the whole body and mind a reset. She says that instead of counting the benefits of yoga one by one, it’s the overall “reset” that yoga gives the body that helps with recalibrating all body systems.
The human body and mind are inseparable from each other. They are mutually reinforcing. When all parts of the body and mind are in healthy tandem, they produce excellent health, happiness, and an eagerness to live well. This in itself helps psychologically retard diseases of imbalance like diabetes. Because the human body cannot be reset in parts, yoga is perhaps the only system that gives your body’s “operating system” a holistic reset.
The following 8 yogic postures (or asanas) are not only beneficial for people with diabetes but also easy to do for beginners. Those with a bit of practice can aim to hold these postures for more prolonged durations after they get into the correct positions.
All yogic postures require inhaling whenever there is a slight backward bend of the body − and exhaling whenever there is a forward bend. But once you get into the final position, you should resist the temptation to hold the breathing to hold the posture. Breathing must be steady, calm, easy, long, and fluid in the pose.
Note: Various experts recommend the following yogic postures for diabetes patients. The explanations of how to do these asanas are compiled/adapted from YogaJournal.com and ArtofLiving.org, to whom we would like to give credit.
But there is always a caveat − please read these for information, but learn to do them correctly with practical training from a certified yoga professional.
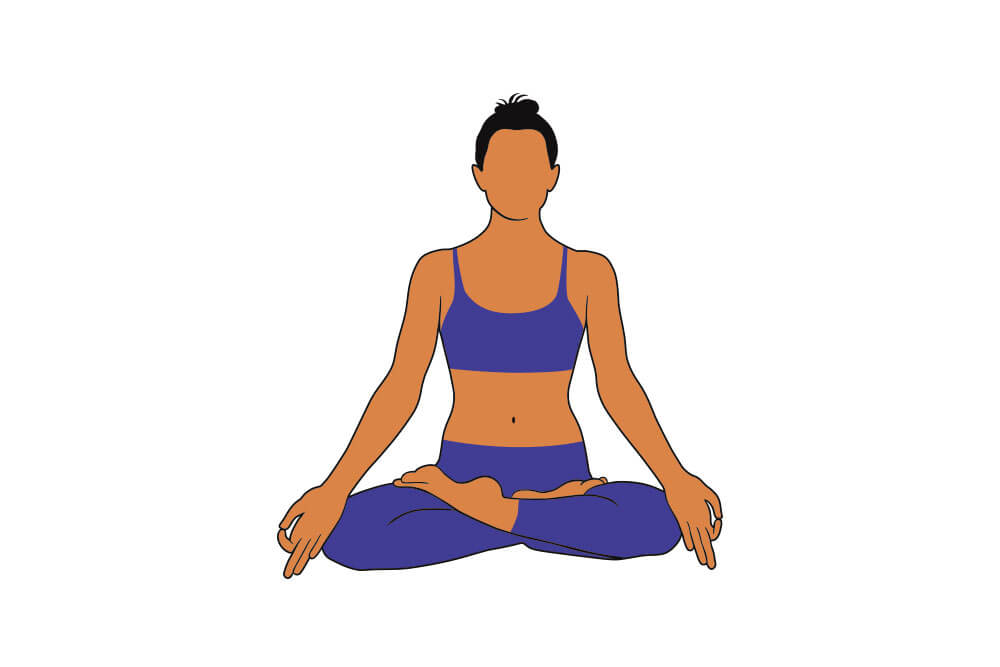
How to do it:
Sit with legs stretched out in front of you while keeping the spine erect.
Bend the right knee and place it on the left thigh. Make sure that the sole of the foot points upward, and the heel is close to the abdomen. Now, repeat the same step with the other leg.
With both the legs crossed and feet placed on opposite thighs, place your hands on the knees in the shown mudra position.
Keep the head straight and spine erect. Hold and continue with long gentle breaths in and out.
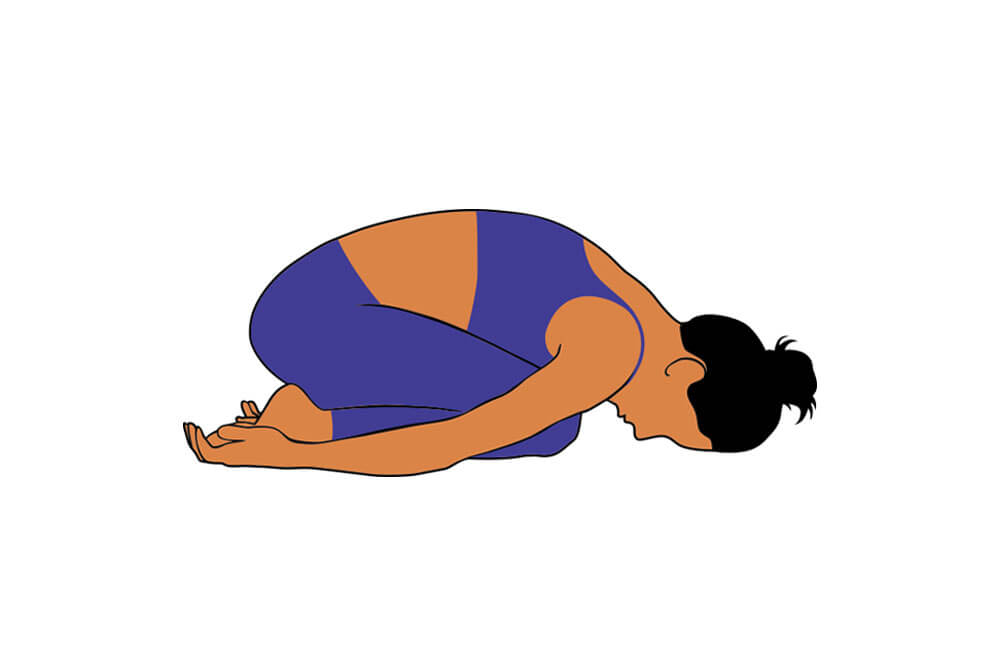
How to do it:
Come to your hands and knees. Spread your knees wide, keeping the tops of your feet on the floor with the big toes touching.
Bring your belly to rest between your thighs and root your forehead to the floor. Relax the shoulders, jaw, and eyes.
There are several possible arm variations. You can bring your arms back alongside your thighs with the palms facing upwards (as shown above). Or you can stretch your arms in front of you with your palms toward the floor.
Stay as long as you like in this fetus-like position, relaxing with the steady inhales and exhales of your breath.

How to do it:
Lie flat on the ground with your stomach on the floor. Your feet must face downwards, and your arms must be placed beside your body.
Gently fold your elbows. Place your palms under your shoulders and closer to your floating ribs. Press your palms firmly on the floor and gently lift your knees, hips, and torso off the mat.
Keep your arms firm and your elbows straight. Broaden your shoulders and look up. Ensure that your knees don’t touch the floor.
Put pressure on your toes by curling them inwards and pressing them on the floor before extending them outward. Hold the pose for as long as it feels good, breathing easily. Exhale and release.
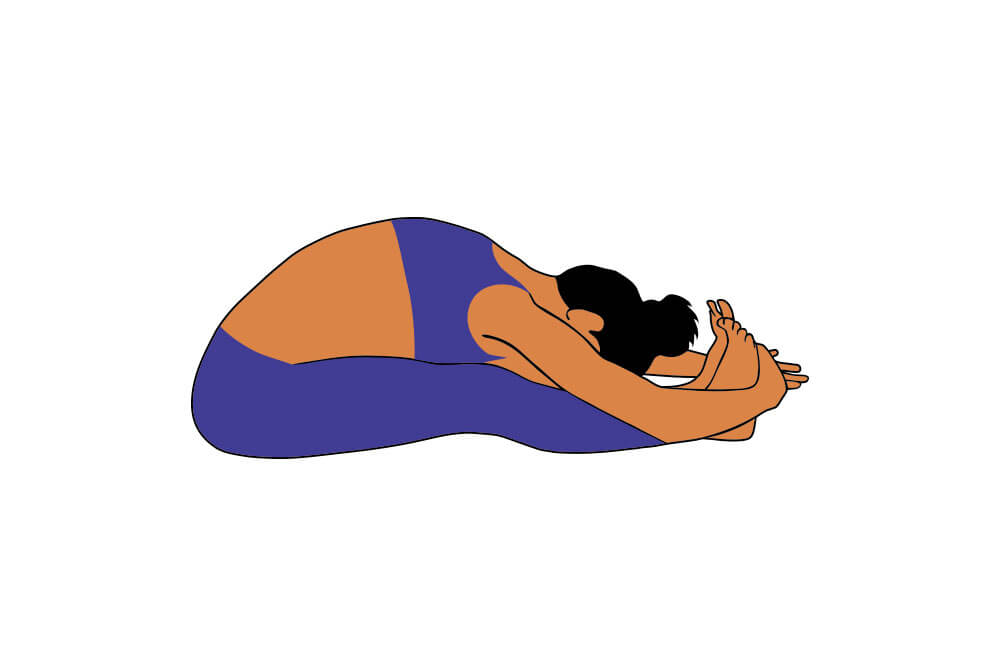
How to do it:
Press your heels away from your body with legs outstretched. Press your palms or fingertips into the floor beside your hips.
Keep your front torso long, exhale and lean forward from your hips. Lengthen the spine to fold toward your legs without rounding your back.
Walk your hands out along the outside of each leg as far as they will go. If you can reach them, hold the sides of your feet with your hands. If you are holding your feet with your hands, bend your elbows out to the sides and lift them away from the floor.
Stay in the pose as long as comfortable and breathe easily. Exhale as you release the position.

How to do it:
Lie on your belly. Press all your toes into the floor and bend your knees, keeping the toes active.
Grab the outer edges of your ankles with your hands and flex your feet firmly. Lift your rib cage and shoulders toward your ears.
Lengthen your tailbone and kick your legs back into your hands as you hold on firmly. Then lift your head and heart. Gaze forward.
Press down through your thighs to lift your chest. Stay raised for till you are comfortable while breathing steadily. Release the position in reverse order, slowly.
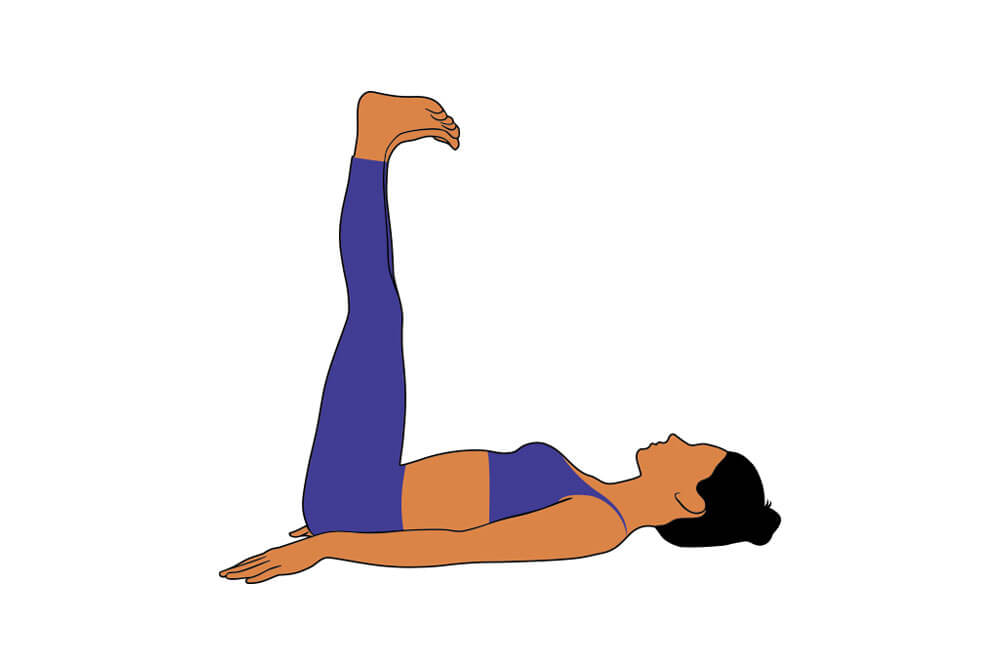
How to do it:
Lie in a supine position with your back on the ground. Both your feet and knees should be kept together, and your breathing should be normal.
While breathing in, slowly raise the legs to a 90-degree angle from the floor without jerking. Do not raise the shoulders from the ground.
The upper body, arms, and face are to be relaxed. Do not bend the knee or lift the lower body or buttocks from the floor. During the final position, your legs should be kept straight with the toes pointed to the ceiling.
Relax and breathe normally. Don’t let your legs flop hard to the ground when releasing the pose. Bring them down slowly.
How to do it:
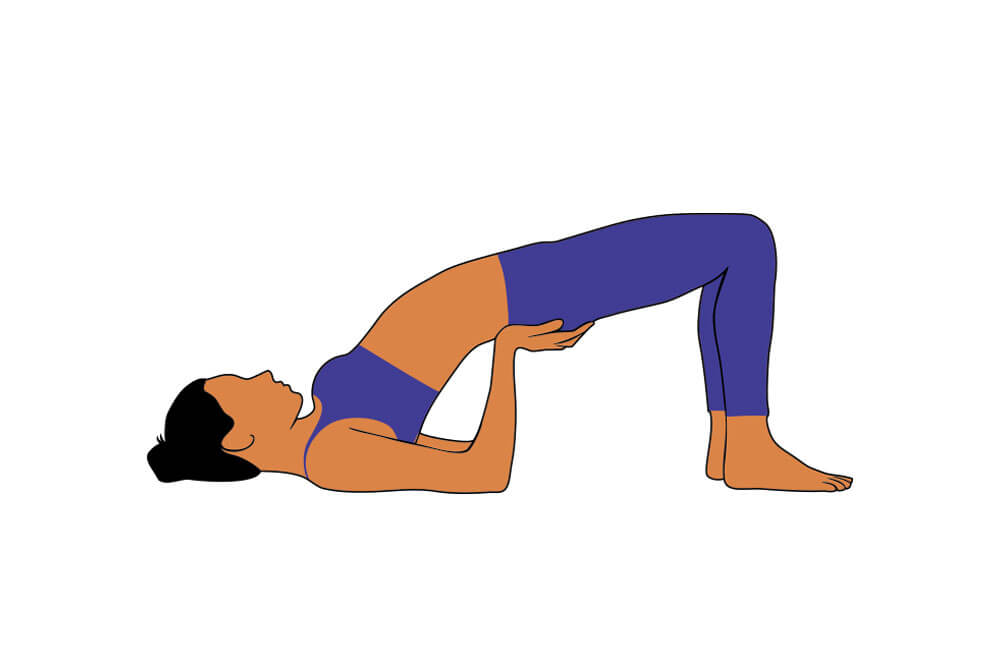
Lie on your back with your knees bent, your legs and feet parallel, and hip distance apart. Move your feet closer to your buttocks.
Press down firmly through your feet and inhale as you raise your hips, lifting from the pubic bone rather than the navel.
Clasp your hands under your back with elbows on the floor. Broaden your collarbones and get on top of your shoulders. Breathe normally and hold for as long as comfortable.
To finish, exhale, release your hands, and lower your hips to the floor. Allow your back to return to rest on the floor gently.
How to do it:
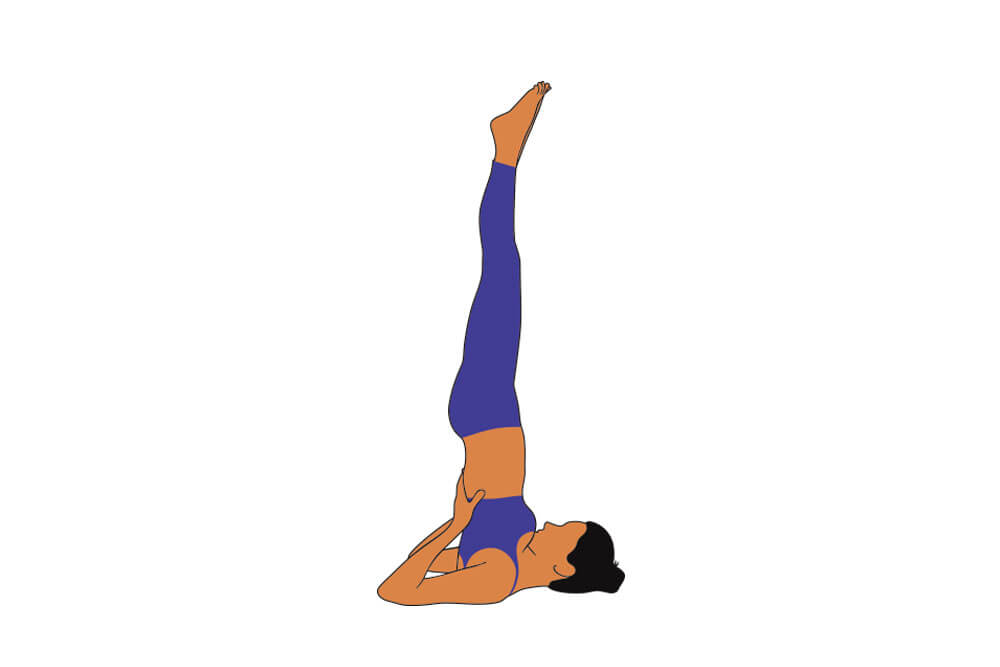
Lie on your back with hands by your side. With a single movement, lift your legs, buttocks, and back so that you come up high on your shoulders. Support your back with your hands.
Move your elbows closer towards each other, and move your hands along your back, creeping up towards the shoulder blades. Keep straightening the legs and spine by pressing the elbows down to the floor and hands into the back.
Your weight should be supported on your shoulders and upper arms, not your head and neck. Keep the legs firm. Point the toes up. Press your chest toward the chin.
Keep breathing deeply and stay in the posture for as long as you are comfortable. Come out of the pose by first lowering your knees to your forehead. Bring your arms down to your sides and gently ease your torso to the ground.
Diabetes care involves many angles of treatment – diet, medications, and exercise – and yoga as part of the exercise regimen helps immensely.
Remember, caring for your diabetes is also a way to care for your heart. If you are diabetic, treat your body and mind responsibly. And thereby, treat your heart responsibly too.